How many levels should you display on your bump-it-up wall? Three? Five? Ten?
Evidence on how many levels to include on your bump-it-up wall is scarce. We know that a single worked example has an effect size of 0.58 according to John Hattie. This is valuable evidence that even one worked example helps students to reach their goals.
What if we used more than one worked example?
Therefore, we can imagine that having more than one worked example, especially when a number of samples represent an aspirational sample for different levels of ability, that a bump it up wall has a significant effect size.
Lyn Sharrat takes this one step further (or too far?) and suggests that there should be a sample to represent every student in your classroom. This could be ten or more samples. For teacher sanity – I disagree with this notion. No teacher has time to write or co-construct a sample for this many levels, and there’s no guarantee that a range of samples is available to use.
Use your marking guide and your students to make the decision
I believe that an effective Bump It Up Wall should ONLY include samples to represent each level on your marking rubric. This comes with one caveat – the ability levels of your class. For example, if your marking rubric includes A-E, but all your students are working at or above a D level, then there is no need to display the D.
Furthermore, students need to be assessment-literate learners who have aspirational examples of what the next step on the staircase looks like for them.
This means they need to work within the parameters of the A-E assessment model, with the next aspirational step being the next achievement level. So, a student who has achieved C on a pre-test will be looking at the success criteria to ‘bump up’ their learning to a B level (within one feedback cycle).
Using Bump It Up Walls within a Feedback Cycle
When teachers use formative assessment alongside a self and peer feedback cycle, students have multiple opportunities to ‘bump up’ their learning.
I can recall an assessment piece completed by one of my primary classes, where 18/26 students achieved an A grade. Eighteen A students! Each week, we completed a formative assessment with self, peer, and teacher feedback and student goal-setting. Students understood exactly what they needed to do to reach the next level, and were given plenty of opportunities to gauge their progress. The results were unbelievable phenomenal, and therefore moderated and confirmed by my teaching team.
These students were shown examples A-C to match both the marking rubric and their ability levels. Their success was due to the aspirational A-C examples provided, clear success criteria, high expectations (I ‘teach to the A’), and a sufficient number of feedback cycles to ‘bump up’ from their initial level of achievement.
The number of levels that you display on your bump-it-up wall is essentially up to you and the needs of your class but it can have a huge impact on your students’ achievement levels.
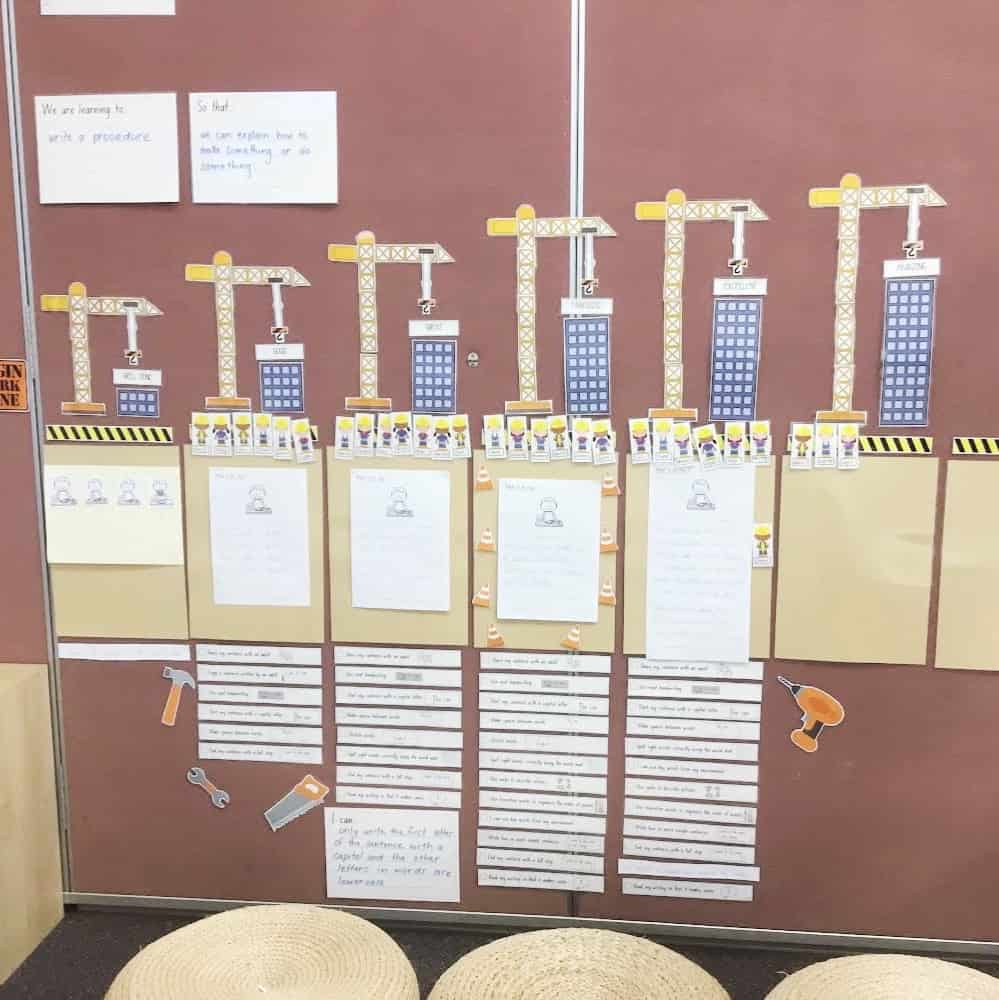
Here are my top tips for an effective bump-it-up wall display:
- Display an example to match each level of your marking rubric, aligned with the abilities of your classroom.
- Don’t display work that is lower than the ability of your classroom
- Try to show every child an aspirational example, HOWEVER, ensure that your A sample is aligned with your marking rubric and not a level above.
- Use clear and explicit success criteria. Success criteria MUST match your marking guide. Nothing more, nothing less.
- Ensure that you embed enough formative assessment and feedback (weekly/fortnightly) so that students have time to improve to the highest level.
- Teach to the ‘A’. Always model the highest level of achievement. Your students will meet you there.

