If you haven’t asked yourself how to save time on lesson planning, are you even a teacher?!
Besides teaching our students, planning is probably the most time-consuming activity we undertake every week. Looking through our curriculum, or unit plan; planning a sequence, then your individual lessons. Differentiating for individual needs. Then there is resourcing the manipulatives, props, digital tools, and printed worksheets that you need – it is a huge job.
Worse still – we do most of it in our own time!
What disorganized planning looks like…(this is going to be REALLY familiar)
I used to be the teacher driving to school stressed and mentally recapping my to-do list. I was guilty of the following:
- Preparing lessons at 7.30 am in the morning
- Visiting the resource library on the way to a lesson
- Printing worksheets in the break before a lesson (and missing your chance because someone else was there!)
- Being caught by a parent in the schoolyard and missing vital prep.
- Spending half of Sunday ‘preparing for school’
- Not leaving school until 5 pm in the afternoon
Once, I even walked my students up to the administration building during class time to wait while I printed worksheets. Well, wouldn’t you know it – THE PRINCIPAL walked past! Luckily they exclaimed how wonderfully my class was lining up (and not asking why they were there in an out-of-bounds area!)
What do you want your day to look like?
I KNEW that I didn’t want to be at work at 7.30 am or long after the bell at the end of the day. I wanted to be exercising or at home with my family during that time instead. Work/life balance or lack thereof is the fast track to teacher burnout!
Secondly, I wanted to be focusing on what really matters. The BIG ROCKS – reading, spelling and phonological awareness, writing, and maths. I wanted assessment-focused teaching and learning that was going to set my students up for success.
What do YOU want your school days to look like? Would you like an extra 20 minutes at home? You can do it!
What does organized planning look like?
Well-organized planning is:
- Time-limited – set a time amount that you are willing to spend getting ready for your week. For me, that time period is two hours at the beginning of the term, and then two hours for each week. When I focus on the BIG ROCKS, this is plenty of time.
- Done at school.
- Well-resourced with a range of teacher and student resources
- Details are in ONE place and easy to share with a substitute teacher
- Ready at the beginning of the week, for the whole week. I like to have my planning completed by Friday for the coming week. This frees up my mind over the weekend so I can truly relax.
So you can:
- Deliver well-targeted lessons that are putting your students on the path to success
- Get to school later and enjoy more time at home with your family/exercising/stopping for your favorite coffee on the way to work
- Walk straight past the photocopier every morning
- Come into your classroom, plug in, and get started
- Call in sick and send off your daily plan within 5 minutes – no need to spend an hour coughing and spluttering over your email because you had no idea what you were going to teach that day
- Go home when the bell rings to live your life outside of teaching!
So, here are my tips:
1. Begin with your assessment
Get your unit plans and focus on the ‘big rocks’ – your Learning Intentions and Success Criteria
2. Create systems including a Resource Bank
This is the most important step of your planning. It sets you up for seamless weekly planning and keeps you away from the photocopier during the week. You will need to be generally well organized, but also focused on your current units of work.
No. 1 & 2 are completed at the beginning of your units before you do any weekly/daily planning.
3. Plan a week ahead
Things that influence how I plan:
- I backward map from assessment, determining what students will need to be able to know and do, and I focus on those ‘big rocks’
- I plan two weeks in advance before school begins, and one week in advance during term time.
- I give myself two hours max. The first hour is used to write my planning into my template; the second hour is used to print and collate all of my resources.
- I like to have the same lesson sequence each day. I’m a primary school teacher so this is easy for me to do, and I find it helps to create a calm classroom and manage behavior beautifully. It also helps me plan easily when I am planning for the same activities each day. If I have a specialist lesson during the day, I will leave the afternoon planning blank to catch up on Maths and English so I don’t have to back-track.
- When I am consistent, my students also know what to expect. When my students know me and my classroom, it becomes easy for me to find quiet time to reply to an email or mark some student work during class time. If I don’t have enough time during class time, I will work through my lunch break so that I can still go home soon after the school bell.
Here is an example of my daily plan:
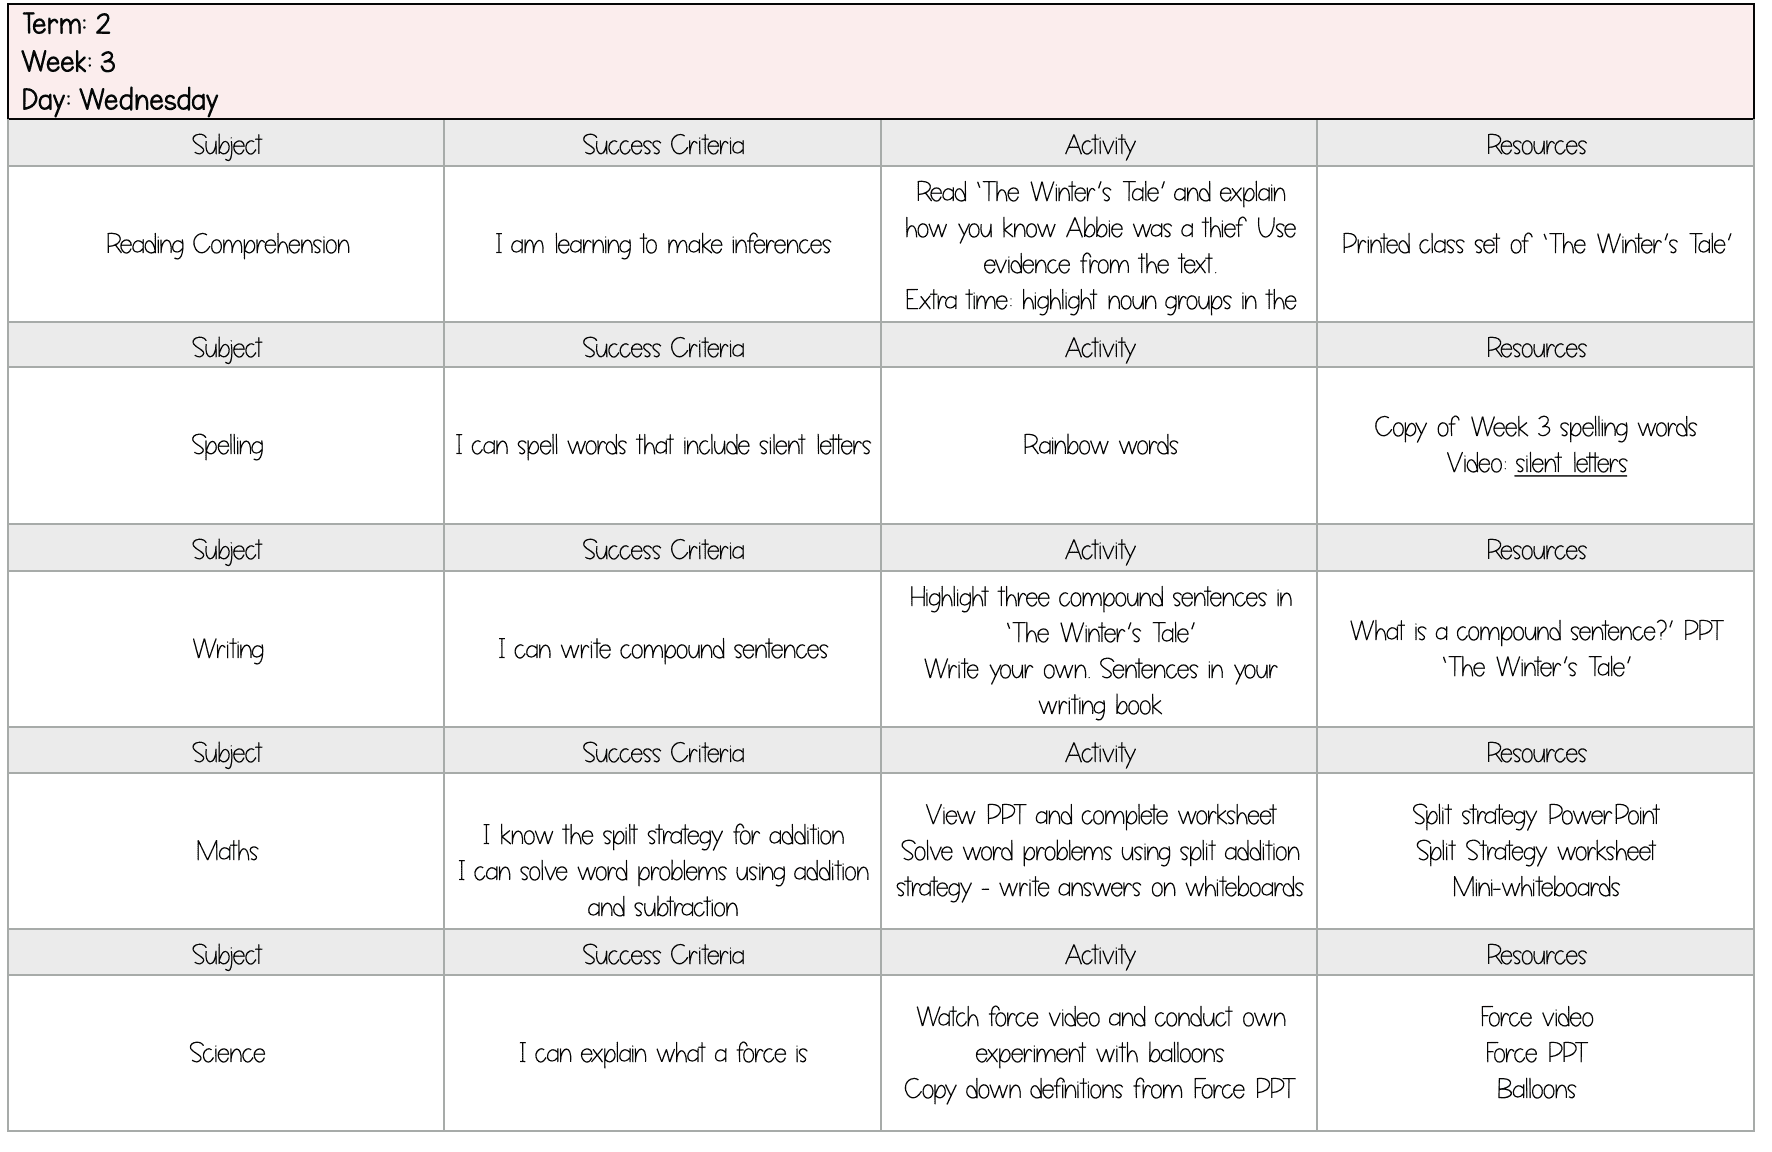
You’ll notice that I don’t use a timetable-style planner.
I DO keep a timetable master – just one page and synchronize important times with alarms on my phone, so I don’t forget anything BUT I keep those things separate from my planning.
4. Organise and complete your weekly planner (1 hour)
You already know WHAT you are teaching and the resources you have available. Use your overview planning and resource bank to map out your teaching sequence. For instance, if you need to address seven Success Criteria in your English, you should aim to cover two of these each week.
5. Putting it together
When you have completed your daily plans, for example, Monday-Friday, create your slideshow for the week.
I like to add a slide for each subject area and include my links (easy to grab from your daily plan) and screenshots of worksheets or texts. This really saves me on photocopying!
I often duplicate slides, such as spelling or reading if I am using the same words or text throughout the week. Then all I have to do is modify the activity. Easy!
6. Back up, print, organize
Make sure you have saved your planning, print the resources you need, and organize everything in one spot in your classroom.
Whew!
I don’t believe that teachers should spend their weekends, mornings, and afternoons planning. After all, we are professionals and have the capability to run a class with no prep whatsoever (Have you seen us at a birthday party? LOL).
So take back your time, have confidence in your abilities, and don’t take that planning home!
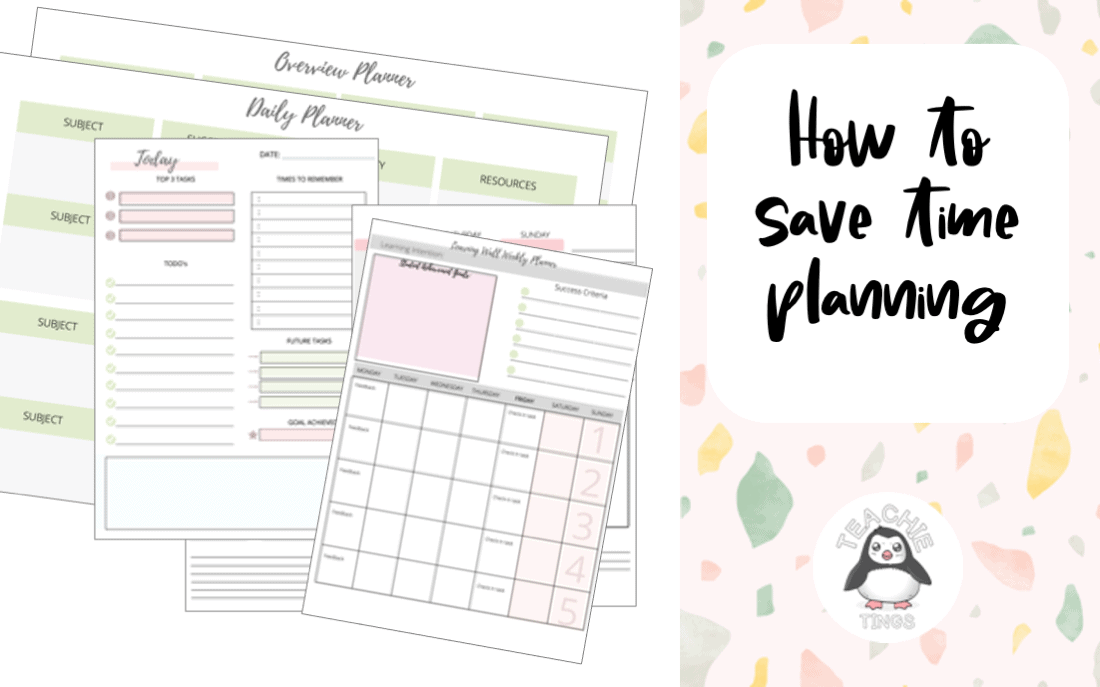
Ready to get started with my step-by-step guide and templates?
 It’s more than just a planner. It’s my 4-step system for focussing on what really matters, getting organized, spending less time planning, and less time at school!
You will receive
- printable templates to build your own paper planner.
- digital templates for digital planning
- slideshow templates for your in-class lessons.
- how-to document to walk you through your beginning of term and daily planning
- planning that is focused on Learning Intentions and Success Criteria (the critical part of your job)
